


Manufacturers in the electronics industry need a reliable and efficient supplier for the electronic chip that is used to make our electronic appliances, smart gadgets, and so on. Whether it is an electronic heart monitor, a child’s toy that is controlled remotely, or a luxury watch, there is a very crucial component that helps power these products. The printed circuit board (PCB) is at the core of all of these products.
The PCB manufacturing process: The origin of a one-stop PCB assembly
Before the one-stop PCB assembly was conceived, PCB manufacturing always involved several complex steps. These involved circuit board printing and storage, procuring various electronic components, PCB assembly, as well as testing, which is used to verify that the board works according to specifications.
Before now, original equipment manufacturers (OEMs) depended on a multi-partner, multi-vendor approach to source for PCBs. This approach is also used for product testing, assembly, and manufacturing.
But with time, manufacturers discovered that this was a very cumbersome process. Additionally, the process is prone to errors, too expensive, and slow.
Due to this, custom and ready PCBs became highly demanded. This led to one-stop PCB assembly processes becoming a preferred choice for electronic makers to produce their boards.
The process involved in the assembly of PCBs
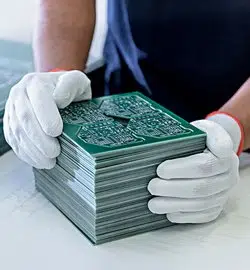
When it comes to the PCB assembly process, there is a process involved. Before you get to assemble your electrical components, you need to develop its circuit board. At this stage, the circuit board can be called a PCB or a prototype circuit board.
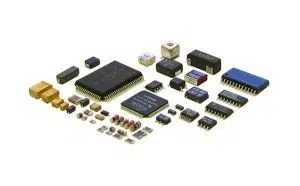
When it comes to PCB assembly, many customers seem to lack a proper understanding of the subject. A PCB board assembly (PCBA) or the printed circuit board assembly, is the process whereby the paste is soldered onto the PCB. It also involves the assembly of the PCB with the different components it needs such as integrated capacitors, resistors, and circuits.
One-stop PCB assembly: The process involved in putting together a PCB
The first step: Put solder paste onto the circuit board
At this stage, the thin stainless steel stencil is placed over the PCB board with the use of a mechanical fixture. The solder paste is evenly applied onto the circuit board. This is done with finesse and accuracy to ensure that the paste is applied in the right locations.
The second step: The pick and place machine
The surface mount components or the SMDs should be applied onto the prepared PCB with the use of a robotic machine. A robotic machine is preferred at this point because it produces the needed level of speed and precision needed to effectively and efficiently execute this phase of the process. Next, you will need to solder the components onto the surface of the circuit board.
The third step: Allowing the solder paste to solidify
A one-stop PCB assembly process involves the availability of the right equipment and instruments to allow for the solidification of the soldered paste. For you to allow the components of the PCB to stick to the board, the solder paste needs to undergo a process known as reflow. It is then left to stay in place for a long time. This ensures that it has enough time to undergo a proper solidification process.
The fourth step: Inspection of the PCB assembly
A one-stop PCB assembly also involves the availability of an accurate and precise inspection process. For this step to go on efficiently, there has to be the presence of an experienced inspection team as well as the use of sophisticated inspection tools. The PCB assembly process is usually conducted on completion of the reflow process.
When the process reflow is 100% complete, you must ensure that the mounted components have been soldered to the correct positions. As soon as all of these have been completed, the next stage is the inspection of the PCB.
At this stage, you will usually test and inspect the assembled Baird to verify and validate its functionality. The PCB inspection process is a part of the quality control process that is used to certify and validate the functionality of printed circuit boards. For quality control, the PCBA can be checked by using processes like:
- Manual checks: This is an individual inspection that the PCB designer performs to check the PCB quality.
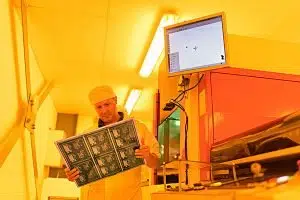
- Automatic optical inspection: The automatic optical inspection process is a professional PCB inspection method that is suitable for large production of batches of PCBAs. The AOI or the optical inspection machine is equipped with cameras of high quality that are set at various vantage angles to be able to get a detailed view of all the soldered connections.
- X-ray inspection: The x-ray inspection method is a more holistic process that is applied when it comes to the production of PCBs with more complicated specifications. This inspection process is performed through an examination of the different PCB layers. It is also used to check the board for possible problems.
The fifth step: Inserting the PCB plated through-hole component
The PCB plated through-hole (PTH) is a hole in the printed circuit board that is plated through the PCB. Instead of applying the paste to the board through the process of soldering, PTHs need a more specialized soldering method.
- Manual soldering: This is a through-hole method of insertion that is executed manually.
- Wave soldering: Wave soldering is the automated form of manual soldering. In this method, a wave features molten solders to insert all the holes onto the bottom part of the PCB at once.
The sixth step: Completing the final inspection
As soon as you complete the process of soldering (which is an important part of PCB board assembly), then you can move on to the stage for final inspection and perform the functional test. You can operate the power and PCB simulated signals. This is used to verify the electrical characteristics of the PCBs.
To check for possible failure, it is when the test shows a fluctuation with the electrical signals and the test is conducted.
At this point, any PCB that fails this final round of inspection should be scrapped. This process is started all over again until you produce a successful and validated PCB.